
Intelligent
Shutter
Safety
Easy to fit
Play the video to see just how simple a Centadrive fitting can be!
Centadrive® support
Instruction manuals, videos, and a dedicated sales team are all there to offer support and advice on the simplicity of installation and to highlight key benefits Centadrive® has to offer the multi-drop urban delivery vehicle. A fully fitted demonstration vehicle is also available - a perfect opportunity to judge for yourself!
Available downloads:
Installation Instructions
Call 01922 471000 to discuss Intelligent Shutter Safety, or Request a demonstration at your convenience.
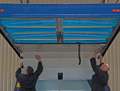
Fast, easy installation on new builds or retrofit upgrades
2 experienced fitters - 2 hours,
7 simple steps and only 3 wiring connections required. Installation of the Centadrive® Unit couldnt be easierStreamlined installation process
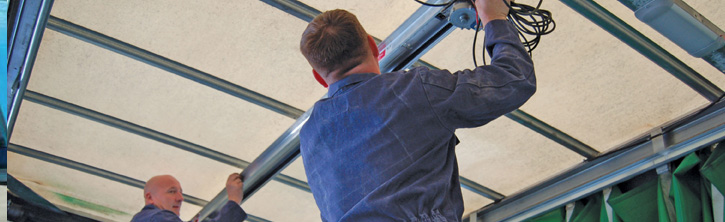
Working closely with a number of reputable bodybuilders part of Centadrive®s design brief was to identify a streamlined installation process to improve productivity and workflow in order to minimise valuable workshop resources and vehicle downtime.
Fitted centrally within the roof space of the cargo area Centadrive® can be fixed directly to existing roof bars with no additional cross members required. The Electronic Control Unit (ECU) is then simply screwed to the bulkhead and once the 3 wiring connections are made, no fiddly adjustment of Centadrive® 's electronic settings are required. Just 2 clicks of the remote to 'cycle' the shutter mechanism back and forth along the track, before attachment to the door, is all the 'setting' that is required.
Installation - 7 easy steps:
| 1. | Ensure free running of existing door, or to maximise performance, fit the new lightweight, composite door. |
| 2 | Bolt Centadrive® into position. |
| 3. | Screw Electronic Control Unit to bulkhead |
| 4. | Attach wiring looms - only 3 connections! |
| 5. | Switch on and test. |
| 6. | Attach linkage mechanism to the shutter door. |
| 7. | Drive away and realise the real benefits Centadrive® has to offer. |
Remote-controlled
shutter door systems for
multi-drop delivery vehicles
Centadrive® - a trademark registered to Albert Jagger Limited | shutter door systems for
multi-drop delivery vehicles
Centaur Works | Green Lane | Walsall | West Midlands | WS2 8HG | United Kingdom |
t: +44 (0) 1922 471000 | f: +44 (0) 1922 648021 | e: sales@centadrive.co.uk |